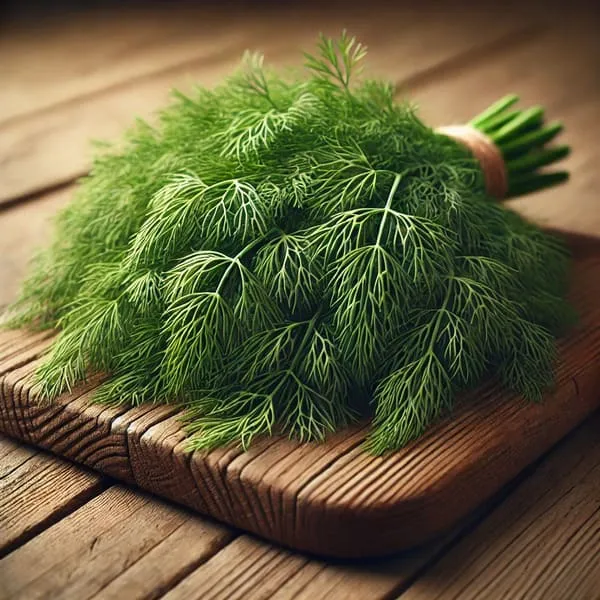
How to Grow Dill Hydroponically
(Complete Indoor Guide)
Can You Grow Dill Hydroponically?
Yes! Dill grows exceptionally well in hydroponics thanks to its shallow root system and fast growth cycle. It adapts to both simple systems like the Kratky method and more advanced setups such as Deep Water Culture (DWC). With proper lighting, pH control, and pruning, you can enjoy fresh dill year-round indoors or outdoors.
📌 Quick Overview: How to Grow Dill Indoors Hydroponically
| 🌱 Factor | ✅ Optimal Conditions |
|---|---|
| Best Varieties | Bouquet Dill (fast-growing, aromatic), Fernleaf Dill (compact, great for indoor systems), Mammoth Dill (large leaves, best for outdoor hydroponics). |
| Best Hydroponic Systems | Kratky Method (low-maintenance), DWC (higher yields, faster growth). |
| Root System | Shallow, fibrous roots — thrives in net cups with coco-perlite mix. |
| Soaking Seeds | Optional: soaking 12–24 hrs speeds up germination but not mandatory. |
| Substrate | 70% coco coir + 30% perlite for moisture retention and aeration. |
| Optimal pH | 5.8 – 6.2. |
| EC Range | 1.2 – 1.8 mS/cm (mild feeders compared to fruiting plants). |
| Light Needs | 12–14 hrs under full-spectrum LED OR 6–8 hrs strong natural sunlight. |
| Temperature Range | 65–75°F (18–24°C) |
| Growth Cycle | Germination (7–10 days) → Vegetative growth (3–4 weeks) → Harvest (from day 30 onwards). |
| Yield | 1–3 oz per plant per harvest; multiple harvests possible before flowering. |
| Special Note | Trim flower stalks early to extend leaf production. |
🌱 How to Grow Dill Hydroponically
1. Choosing the Best Dill Variety
Dill varieties differ in growth habit, size, and flavor intensity. For hydroponics, compact and fast-growing types work best:
- Bouquet Dill – Classic variety, quick to mature, highly aromatic.
- Fernleaf Dill – Dwarf variety, ideal for small systems and indoor growing.
- Mammoth Dill – Produces large fronds, best suited for bigger DWC or outdoor hydroponic setups.
💡 Compact types like Fernleaf are easier to manage indoors, especially in Kratky jars or small DWC buckets.
2. Best Hydroponic System for Dill
Dill adapts well to multiple hydroponic systems thanks to its shallow root structure:
- Kratky Method – Low-maintenance, perfect for beginners. Start dill in jars or small containers; once roots extend, leave an air gap for oxygenation.
- Deep Water Culture (DWC) – Provides faster growth and higher yields, especially when growing multiple plants indoors.
👉 If you want a simple, passive setup, use Kratky. For continuous harvests and stronger plants, choose DWC.
3. Substrate & Container Setup
- Substrate mix: 70% coco coir + 30% perlite, or rockwool cubes for seedlings.
- Container: 2–3 inch net cups fit well for dill’s small root system.
- Root behavior: Dill roots are fibrous and shallow — they don’t need deep buckets like tomatoes or peppers.
💡 In practice, sterilizing cocopeat before planting improved germination rates and reduced mold. I moistened it, microwaved it for 3 minutes, and then used it as my starter medium.
4. Lighting & Temperature (Sun vs LED)
- Natural sunlight: 6–8 hrs daily; dill loves bright conditions but can bolt quickly in excessive summer heat.
- Artificial lighting: Provide 12–14 hrs under full-spectrum LEDs. Blue light promotes lush leaf growth; red spectrum supports sturdier stems.
- Temperature: 65–75°F (18–24°C). Avoid temperatures above 80°F as they trigger premature flowering.
💡 When my dill grew too tall indoors, I transitioned it to direct sunlight gradually. This strengthened the stems and prevented legginess.
5. Nutrients & pH/EC Control
- pH: Maintain between 5.8 and 6.2.
- EC: 1.2–1.8 mS/cm (dill is a light feeder).
- Nutrient requirements:
- Higher nitrogen in the vegetative stage for leafy growth.
- Reduce nitrogen and balance with potassium once plants mature, to prevent excessive stalk growth.
💡 In one grow cycle, I kept my EC around 2.0 and noticed the dill became too tall with thick stems. Keeping it closer to 1.5 resulted in bushier, more usable leaves.
6. Pollination & Maintenance
- Pollination: Not required. Dill is harvested for its leaves and seeds, not fruit.
- Maintenance:
- Trim flower stalks (umbels) as soon as they appear to prolong leaf harvest.
- Continuous harvesting from the top encourages new growth.
- Replace plants once they go fully to seed.
💡 I harvested dill regularly for four months before the plants began flowering. By cutting flower stalks early, I kept them producing fresh leaves for much longer.
7. Growth Timeline
- Day 1–7: Germination begins (soaking seeds can speed this up).
- Day 7–14: Seedlings establish; true leaves appear.
- Day 15–30: Vegetative growth; ready for first harvest around day 30.
- Day 30–60: Continuous harvesting; plants regrow quickly.
- After 60+ days: Flower stalks may appear; trim them to extend leaf production.
💡 In my case, dill reached harvest size by day 28 and provided multiple cuttings over three months. Once seed heads formed, I dehydrated excess leaves to make dill spice for pickles and sauces.
🎥 Recommended Videos for Growing Hydroponic Dill
Growing Dill Hydroponically with the Kratky Method
How to Grow Dill & Fun Facts About This Herb
Harvesting Dill Indoors the Right Way
Common Issues & Solutions for Hydroponic Dill
| Problem | Cause | Fix |
|---|---|---|
| Leggy growth | Not enough light or overcrowding | Provide 12–14 hrs LED light; thin seedlings for airflow. |
| Bolting (early flowering) | High temperature or stress | Keep temps 65–75°F; trim flower stalks early to extend leaf harvest. |
| Yellowing leaves | Nitrogen deficiency or natural aging | Adjust nutrient solution; prune old leaves regularly. |
| Weak root system | Overwatering or poor substrate aeration | Use coco-perlite mix; ensure good drainage in net cups. |
| Algae growth in container | Light exposure in nutrient solution | Cover reservoirs with foil or opaque lids to block light. |
| Slow germination | Seeds not pre-soaked or low moisture | Soak seeds 12–24 hrs before planting; keep medium moist during germination. |
❓ FAQs About Hydroponic Lemons
Yes, dill thrives in hydroponics and adapts well to Kratky and DWC systems.
Once dill bolts and produces flowers, leaf production slows down significantly. For most growers, trimming flower stalks early helps extend leafy harvests.
However, in some countries like Armenia, when dill flowers, the entire stem — including the flower head — is harvested, dried, and used for pickling cucumbers, cabbage, or cauliflower. This traditional method gives pickles a stronger aroma and flavor, making flowering dill still valuable even after leafy production declines.
Maintain between 5.8 and 6.2 for optimal growth.
Soaking seeds for 12–24 hrs speeds up germination, but it’s optional.
You can harvest leaves as early as 30 days after germination, with continuous harvests for 2–3 months.
Yes, with LED grow lights and stable temperatures, dill can be grown indoors throughout the year.
Kratky method for simplicity, DWC for higher yields.
🚀 Final Thoughts
Hydroponic dill is one of the easiest herbs to grow, making it perfect for both beginners and advanced growers. Its shallow root system thrives in small net cups, and systems like Kratky and DWC allow for quick, aromatic harvests.
💡 In my trials, the first harvest came at 4 weeks, and by trimming flower stalks, I extended fresh harvests for months. When plants eventually bolted, I dried the leaves to use as spice — nothing went to waste.
If you enjoy fresh herbs for pickling, fish dishes, or homemade sauces, dill hydroponics is a must-have in your indoor or outdoor setup. With proper light, pH balance, and routine harvesting, you can have dill year-round.